Translate

Tuesday, December 3, 2013

Photo Shoots Are Fun

I love when my kids act like my models. They make taking pictures so much fun. 
This time my daughter Norma and her boyfriend Maiki helped me.

Meet

I guess after a while of stand here do this, don't do that, etc.
They got bored and this is what I have to work with


Here is the Zoolander
(I guess she has had some practice with this one)


Now meet Incognito Man
  (Psst is Maiki)

And the Lioness is back to her habitat

These are the best of all of them and trust me there is more, much more.
We all have lots of fun. 

My baby Zami  couldn't stay out of the picture
She didn't get to help mom today but definitely next time.

Thanks guys

P.S.Thank God for digital cameras :)


Saturday, November 30, 2013

Gift Ideas for Him

     Here are the holidays again and we all know that shopping for the man in your life is not an easy task. So if you are looking for the perfect gift for that awesome guy.
Check out this treasury I put together on Etsy. It gives you some ideas on what to get him. Prices ranges from about $20 to over $100 is a little bit for everyone.
     Feel free to share it with your friends.
Enjoy and happy Shopping :)

Saturday, June 30, 2012

Foot Injury... (update)

Ok, from last saturday up until this past thursday my foot is a little better after following my doc directions (you know the usual ice it and keep it elevated thing) it went from 
this

To
That's how little it has improved. You know I can only handle so much crocheting and facebook in a week even though this have help me catch up with orders and FB friends. In the other hand the laundry, cooking, cleaning and work had suffer. Anyway somethings got to give, right. 
Well, I end up going to a podiatrist on thursday (with my new friend the walker) to see if he really tell me what I have. And now is supposed to be a bruised heel bone and I might also have a tear ligament. 
Isn't that great just what I needed. 
He told me to soak it with epson salt a couple of times a day and do some stretches on my foot about six times a day(this part really hurt) and that I have to have a sonogram done on my foot sometime this week. All this have help somewhat but still not able to put much pressure on it. At least not for too long without needing my new friend.
I hope that when I go on actual vacation which is right after 4th of July YAY! I can at least walk for a longer period of time and Enjoy It. Well, regardless I will because by the end of it we are going to be going to Missouri for my older daughter Norma graduation from the Army National Guard Basic Training can't wait to see her. That's my motivation to get better.
Anyway talk to you guys soon. Enjoy 4th of July celebrations and be safe.


Saturday, June 23, 2012

Foot Injury


I will be out of commision  for 1 whole week maybe longer. And let me tell you That Sucks!

And why I'll be out? Cause of a badly sprained left foot
Well, ok my foot doesn't look this bad. But it hurts really bad like this looks. Not Cool at all.

Here is how it happened. It was raining cat and dogs last night with lightning and all. Around 3am the rain and lightning woke me up and I realized that I had to go downstairs. In case you are wondering 
Why I had to go downstairs? 
Well I have a leak in the living room that we haven't got around to fix yet.
And I had to go and see if it was leaking to put something to collect the water. 
Something like this but not as bad.

When I got downstairs in the very last step my foot slipped and all my weight went on my left foot heel. 
Good thing that I'm not a big person. If that was the case I could have broke my foot easily. 
That's how hard I hit it.
Anyway right away I couldn't put any pressure on my foot to walk or go up the stairs. Had to go up sitting on my butt. Great way of messing up my foot, huh. That's to show that when you least expected you can get hurt in no time with the simplest thing.

Went to my doctor this morning using a walker like an old lady and after some x-rays and 3 hours later the doc said that wasn't fractured but badly sprained. To keep it elevated and iced.
Well Now What! Can't go to work. Can't cook-I kind of like this part :) -
Or do much at all.

So I was thinking of doing a Xmas in July Sale on my With Love By Z Shop for the 4th of July week. 
Now with this happening I will make it a Christmas in Summer Sale for 2 weeks Starting June 24th. 
Have to stay busy some how. 
Keep it in mind, pass by and check it out.
See you soon.


Saturday, June 16, 2012

How to Create your Own Polymer Clay Buttons


I always have problems finding large buttons for my neck warmers and when I finally find some they are too expensive. So I decided to make my own in the size, shape or colors I need. 
Went on and did some research and found out that I could create buttons using polymer clay. At first I was like really clay! and was asking my self will they hold the daily wear and tear? and how about washes?. Well did the test and guess what they do hold very nicely. They do have a rubbery feel to them after they're done and wouldn't recommend putting them in the dryer even though I haven't try it. 
Now I make all the buttons I need. I really enjoy making the marble ones because each of them are very special and unique. No need to waste time looking for that perfect button in the perfect color. 

I want to share this little discovery with you. Hopefully this tutorial helps all of you that may have the same problem I had. I try to make it as simple as possible for you to understand and added as many pictures as possible. 

Items you'll need
NOTES:
*An old cookie sheet will do.
*Same with the rolling pin or you can use any smooth can or object instead
*I use a glass cutting board but one of those flexible plastic ones that you find in any dollar store will do


Notes:
*Cookie cutters are great if you want a flower shape or any other fun shape. I prefer simple better.

Notes:
*I like using the Sculpey brand because I find it to be the more economical brand(about $2 each) and you get the same results as with other brands
*You will need 2 different colors of your choice for the marble ones or just 1 for solid.
Now let the fun begin :)


Remember they'll have a rubbery feel to them after they have cool down.

Now have some fun creating your very own buttons.
Please let me know if this tutorial help or if you have any problems with it.
Zaira ;)

Sunday, May 27, 2012

Behind the scenes with Arelis

Had an awesome day with my beautiful 17yo daughter Arelis. We went to the beach to take some photos for my shop and I tell you that she had me laughing all day I couldn't stop. It was great to spend time with her and reconnect. You know that we always forget about the little things that make the day a whole lot better and for me this was it. Seen her smile and being her corky self was priceless
Well meet Arelis in these behind the scenes photos
Here is her Zoolander look
She was really enjoying herself
I love you too, Babe.
I better get started editing we took so many pics that is going to take me a few days to go thru all of them and get them ready to be posted at the shop
Thank you Ari for all your help today. Hope to do it again soon.
Love you 
Mom
See you guys soon.

Wednesday, May 23, 2012

How to Reuse / Recycle a Cardboard Box for Mailing

Hello 
As we all know times are tough and money is tight. That's why I'm always looking for ways to save money, especially when I'm in the need to ship boxes constantly for my ReTouched shop on Etsy (www.retouched.etsy.com).
Boxes may not seem expensive to buy, but when you are shipping all the time it will add up quickly, Right! 
Why not simply flip it inside out? And that's it. You will have a nice clean, new looking box for shipping with no spending involved besides the few minutes it takes to do it.


Please don't do this.
I know is accepted by the post office like this but it doesn't look professional at all.


Well if this is your case this nifty idea will help you save some $$$ on mailing supplies and still have a professional look 
Just follow this 5 simple steps


Here is what you need:                      
*Box (size needed for shipping)
*Shipping / Packaging Tape
*Knife
*Hot Glue Gun
*1 Glue Stick
Now how to do it:
Plug in your hot glue gun to get it nice and ready.
Step 1
Take the tape off the bottom of the box and flatten the box as shown.
Step 2
Find the seam and slide the knife through to open up the box 
Step 3
Open up the box 
And flip it inside out
Step 4
 Re-glue the seam back together again
Step 5
Reshape your box
And tape up the bottom
Now you have a box that's ready for shipping 
And you went from this    To    this in no time
Thank you for stopping by.
Hope you enjoy this tutorial and please feel free to leave your comments and share it with friends and family.
See you guys next time :)
Zaira

Sunday, May 20, 2012

Garden is Finally Done

Let start this blog with this weekend project my flowers and veggies garden. Well is more like a few weeks project cause I kept putting it off with the I'll do it tomorrow kind a thing. I think is an aquarius thing you know the procrastination part. I'm pretty sure you guys know how that goes. 
Anyway here I'll walk you thru the project with some pics on how it all went down with the "help" of my little one Zami. You saw how I wrote "help" right with the little thingys. 
That's because I know that if you have kids you know exactly what that means. 


Here I'm starting the cleaning and preparation part.


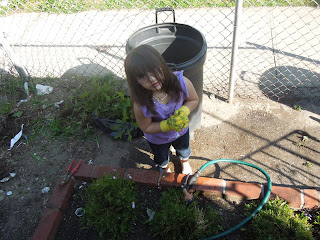
Meet my "help" Zami ready to work with gloves and all begging me to let her "help" me.
"Mommy please, please let me help you"


Now me hands on getting everything in place and as you can see Zami is nowhere to be found


Work in progress


My Oldest daughter Norma planted this flowers. She had given up and thought they were going to die but here they are holding up. They just needed a little love and lots of water (keyword)


But wait a sec there goes my so called "help" having fun with her tricycle while mommy do all the work 


And she is back but not to "help" of course. She was all amazed by a dirt worm I found

And now for the grand finale.
Ta da. 
The final result thanks to my "help" Zami. 

Can't wait to see the fruits of "our" hard work. "We" planted cherry tomatoes, eggplant, red bell peppers and cucumbers or like Zami called them cumbers.
I'll definitely keep you posted with pics of the first veggies "we" get. 
Thanks Dan for taking all the pics.
See you guys next time.